The problem isn't just what's visible. A hairline fracture on the surface can mask deeper delamination. A seam that looks intact may be allowing product to migrate through the laminate layers. And what starts as a manageable repair can escalate into a full containment failure if left alone long enough.
This article covers how to classify crack types, understand what's driving them, execute a proper repair, and decide when professional intervention is the right call rather than a patch.
Key Takeaways
- FRP tank cracks range from cosmetic surface fractures to through-wall failures, and each type requires a different repair approach
- Warning signs include visible cracking, blistering, soft spots, unexplained fluid level drops, and seepage near fittings
- Proper repair follows five steps: surface prep, resin selection, laminate application, full cure, and post-repair validation
- Isolated cracks on sound tanks can often be repaired; widespread degradation or systemic chemical attack typically warrants replacement
Common Types of Fiberglass Tank Cracks and Warning Signs
Not all cracks are equal. Classifying the type and severity before touching a repair tool is what separates a permanent fix from one that fails in six months.
Hairline and Surface Cracks
Hairline cracks are fine fractures confined to the outer resin layer or gel coat. They often appear as spider-webbing and are typically caused by thermal cycling, UV exposure, or minor impact. On their own, they don't immediately compromise tank integrity — but they're not harmless either. Once moisture enters through surface cracks, it begins working into the laminate, accelerating degradation over time.
Structural Cracks
Structural cracks penetrate one or more laminate layers. They compromise load-bearing capacity and are often accompanied by:
- Soft or spongy areas when pressing the tank wall
- Visible delamination (layer separation beneath the surface)
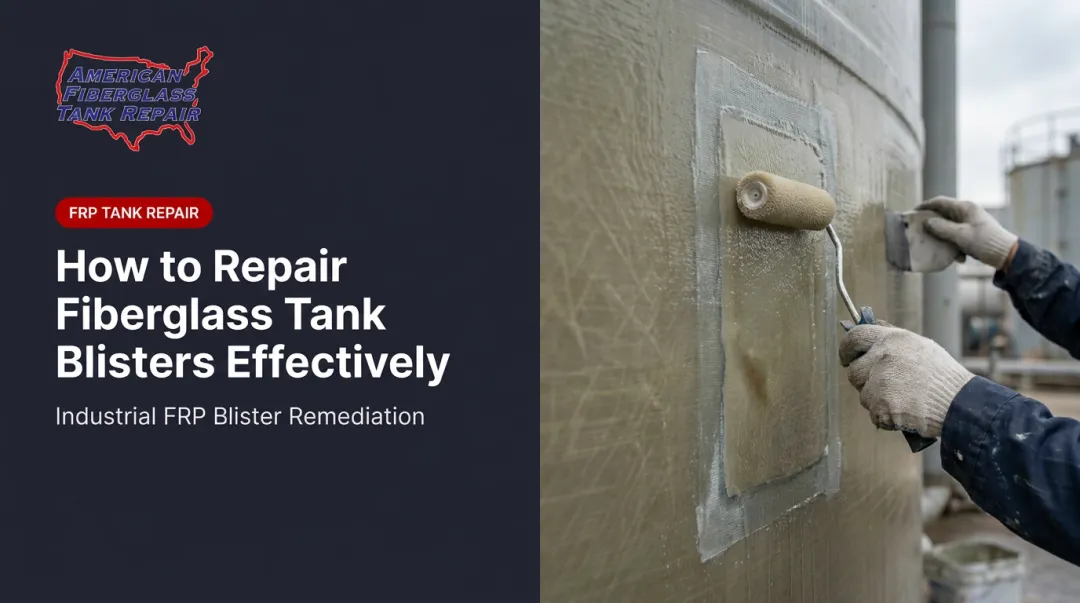
- Blistering or raised bubbles indicating moisture entrapment
These are not cosmetic issues. The FRP matrix has been compromised, and the actual damage extends beyond what the visible crack reveals.
Through-Wall and Seam Cracks
Through-wall cracks are full-thickness fractures: fluid is actively escaping or will be shortly. Seam areas, where fittings are laminated onto the shell, are particularly vulnerable due to differential stress and bond-line weakness at the transition point.
These three crack types each escalate in severity and repair complexity. Knowing which you're dealing with determines your next step — and the warning signs below apply across all three:
Key warning signs to watch during routine walkarounds:
- Visible cracking or spider-webbing on the shell
- Raised blisters or bubbles on the interior or exterior surface
- Unexplained drops in stored fluid levels
- Seepage, staining, or discoloration near fittings and seams
- Unusual odors indicating lining breakdown
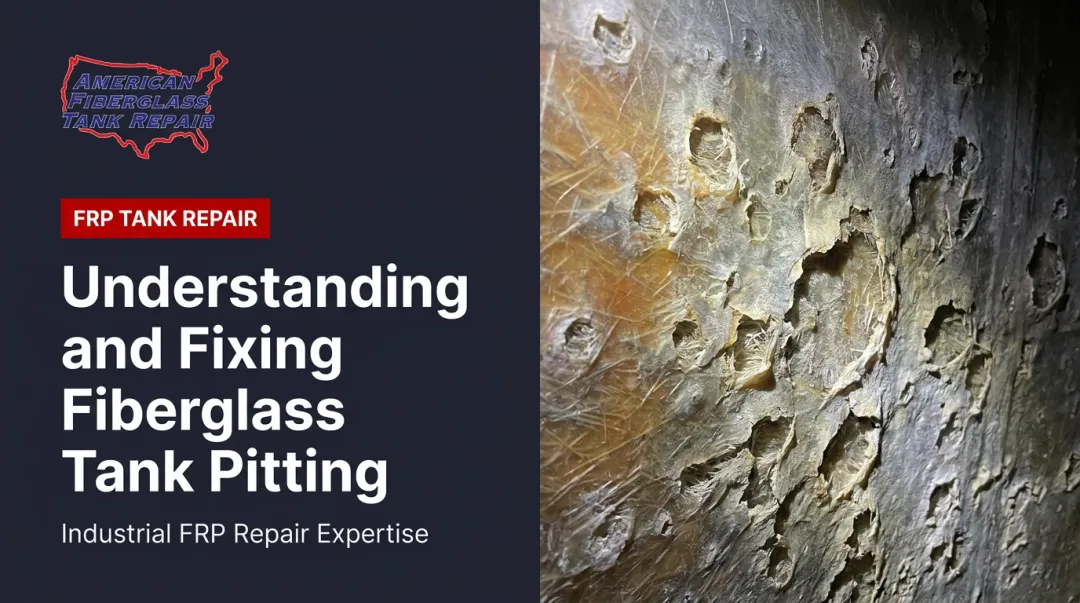
- Discoloration suggesting UV degradation or chemical attack
Why Fiberglass Tanks Crack: Root Causes
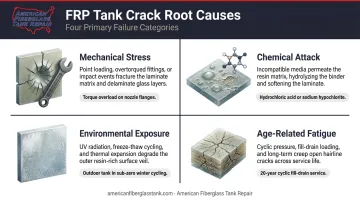
Most FRP tank cracks trace back to one of four categories.
- Mechanical stress: Impact damage, overpressure events, improper support, and foundation settlement all introduce loading the tank wasn't designed to handle. AFTR field crews regularly respond to emergency situations requiring immediate intervention to prevent total tank loss.
- Chemical attack: Particularly aggressive in tanks storing oxidizing chemicals. Research published through NACE confirms that improper resin selection for sodium hypochlorite service can cause corrosion-barrier failure within 3–5 years. AFTR teams most commonly encounter this in tanks storing sodium hypochlorite, sodium hydroxide, ferric chloride, and hydrochloric acid.
- Environmental exposure: UV radiation, freeze-thaw cycling, and thermal expansion/contraction degrade the outer resin layer over time. A 2022 peer-reviewed study on fiber-reinforced polyester composites confirms UV exposure produces microcracks and chemical changes in the laminate surface.
- Age-related fatigue: Hydrolytic degradation builds over decades of service. Research on glass-fiber vinyl ester composites shows hydrothermal aging involves both reversible plasticization (softening) and irreversible hydrolysis, rupturing chemical bonds and degrading the fiber-matrix interface.
What Happens When Cracks Are Ignored
The consequences escalate quickly:
- Moisture infiltrates the laminate and accelerates delamination
- Micro-cracks propagate under ongoing pressure cycles
- Product migrates through the laminate, a condition AFTR's inspection teams detect as capillary migration beneath the corrosion coat
- Buried tanks can experience root intrusion
- What begins as a manageable repair can evolve into an uncontrolled spill with environmental and regulatory consequences under CERCLA/EPCRA reporting requirements
Interior micro-cracking can extend well beyond the visible damage area, which is why subsurface inspection methods — not surface assessment alone — are required for anything beyond cosmetic cracks.
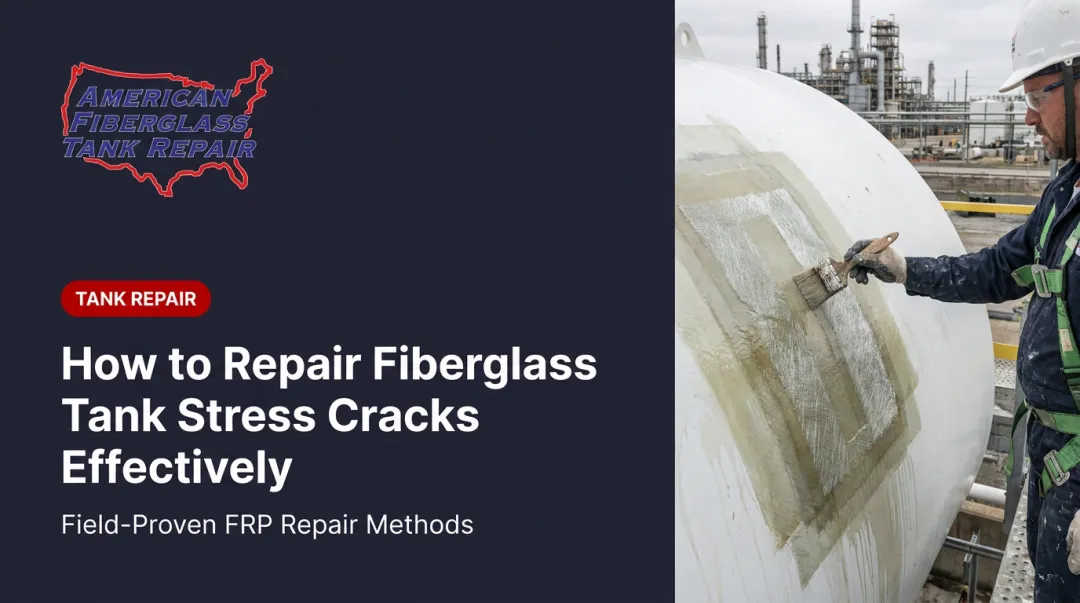
How to Fix a Fiberglass Tank Crack: Step-by-Step
Repairing only what's visible is one of the most common causes of repeat failures. A proper repair addresses the entire compromised zone — which often extends well beyond the visible crack.
Step 1: Drain, Clean, and Inspect
The tank must be fully drained and decontaminated before any work begins. For tanks storing aggressive chemicals — particularly bleach, acids, or other oxidizers — chemical neutralization of the substrate is required. Residual oxidizers will inhibit resin cure and cause early re-failure.
After cleaning, map the repair area by tapping the surface systematically. Hollow or dull sounds indicate delaminated zones that extend beyond the visible crack.
Step 2: Prepare the Surface
Grind or sand the damaged area to remove all contaminated, degraded, or delaminated material down to sound laminate. The grinding zone must extend beyond the visible crack perimeter — exact margins are determined by engineering specifications for the specific repair. Follow grinding with a solvent wipe to remove dust and residual contaminants.
Inadequate surface preparation is one of the leading causes of repair bond failure — cut corners here and the laminate will not adhere to service-level standards.
Step 3: Select the Right Repair Materials
Resin selection must be compatible with both the original tank construction and the stored chemical. General guidance:
| Application | Resin Type |
|---|---|
| General-duty water or mild chemical service | Isophthalic or terephthalic polyester |
| Oxidizing or highly corrosive chemicals (NaOCl, HCl) | Vinylester (brominated epoxy vinyl ester for bleach service) |
| High-temperature or high-performance structural repair | Epoxy |
A generic off-the-shelf patch kit is not appropriate for chemical-service or industrial tanks. AFTR works with custom-blended resin systems and a library of over 45 fiberglass mat, chopped strand, Nexus, Harlar, and carbon veil laminates — selected specifically for the chemical, concentration, and operating temperature of each application.
The corrosion liner veil — C-glass, synthetic, or Nexus — is a critical barrier layer that must be fully restored in the repair.
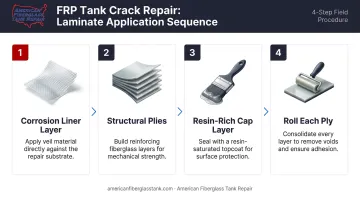
Step 4: Apply the Repair Laminate
The laminate application sequence:
- Apply a resin-rich corrosion liner layer with the appropriate veil material
- Build structural plies using the correct mat or woven roving schedule to restore original wall thickness
- Finish with a resin-rich cap layer or topcoat
- Roll each ply thoroughly to eliminate air voids before applying the next
For through-wall repairs, laminate must be applied from both interior and exterior where accessible. Each ply must be fully wet-out — dry spots create future failure points.
Step 5: Cure and Post-Cure
Resin systems require adequate time and, in some cases, elevated temperature post-cure to reach their design chemical resistance properties. Returning a tank to service before full cure — particularly for chemical-service tanks — is a leading cause of early repair failure.
After cure, sand the repair area smooth and inspect for voids or dry spots. Only then is the tank ready for structural and bond validation.
Step 6: Validate the Repair
Post-repair validation confirms the repair is sound before the tank returns to service. AFTR's engineer-driven inspections use ultrasonic, laser, and high-intensity backlight testing to confirm bond integrity and detect hidden voids, delamination, or capillary migration that visual checks would miss.
Inspections are supervised by Fiberglass Tank & Pipe Institute (FTPI) certified inspectors, with detailed reports documenting surface and structural conditions and confirming return-to-service readiness.
Fix vs. Replace: How to Decide
The repair-vs.-replace decision shouldn't be made on visual inspection alone for any critical-service tank.
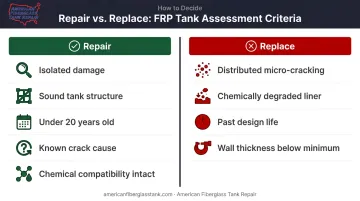
Repair is typically the right choice when:
- Damage is isolated to a single crack or small area
- The tank structure is otherwise sound with adequate wall thickness
- The tank is under 20 years old and has documented maintenance history
- The cause of the crack has been identified and corrected
- Chemical compatibility can be maintained with the repaired lining
Replacement becomes the better option when:
- Micro-cracking is distributed across large areas of the shell
- The corrosion liner has been chemically degraded throughout the tank
- The tank is approaching or past design life with no maintenance history
- Structural testing reveals wall thickness below minimum design values
ACMA reports that FRP tank service life is often projected at 30–50 years, with well-maintained tanks remaining functional well beyond that in corrosive service. That lifespan depends entirely on the condition of the corrosion barrier — which is assessable only through NDT.
AFTR's field engineers assess tanks on-site and develop recommendations tied to the plant's budget and operational requirements. The inspection report documents corrosion coat condition, structural findings, Barcol hardness measurements, delamination extent, and specific remediation steps — giving plant managers the data needed to make a defensible capital decision.
Preventive Maintenance Tips for Long-Term FRP Tank Health
Catching degradation early is far cheaper than emergency repair. A structured inspection program — backed by sound operating practices — is what keeps FRP tanks in service for decades.
Recommended inspection approach:
- At minimum, conduct annual visual walkarounds covering the full shell, seams, and fittings
- Schedule professional NDT inspections (ultrasonic and backlight testing) per FT&V RP 2007-1 guidance — every 5 years for hazardous-substance service, every 10 years for larger tanks in other service
- More frequent inspections for tanks storing aggressive chemicals like sodium hypochlorite or hydrochloric acid
Inspection cadence only addresses part of the picture. Day-to-day operating decisions have an equal impact on long-term tank integrity.
Operational practices that reduce crack risk:
- Ensure proper foundation support with no point loads or settlement
- Avoid overpressurization events
- Verify chemical compatibility before any fluid changes — resin systems are matched to specific chemicals, and switching stored products without reassessing the liner accelerates degradation
- Protect outdoor tanks from direct UV exposure where feasible
- Document all inspections, anomalies, and repairs in a tank service log to track degradation trends
When internal tracking flags a concern — or when the next NDT cycle is due — having a qualified contractor ready to mobilize quickly matters. AFTR deploys field service teams with Service-Pack shipping containers pre-stocked with resins and laminates for both scheduled maintenance and emergency response across all 50 states, Canada, and international locations. Planned maintenance is nearly always less expensive and less disruptive than emergency repair, and professional NDT catches subsurface degradation well before it becomes a containment issue.
Frequently Asked Questions
Can fiberglass tank cracks be repaired permanently?
Yes. Isolated cracks can be permanently repaired when the full extent of damage is addressed, the correct resin and laminate system is used, and the repair is properly cured and validated. A properly executed repair can add many years of useful service life to the tank.
How do I know if a fiberglass tank crack is structural or just cosmetic?
Cosmetic cracks are confined to the gel coat or surface resin with no flexibility or depth. Structural cracks penetrate laminate layers and are typically accompanied by soft spots, delamination, or blistering. A tap test is a useful first indicator, but professional inspection is the only reliable way to distinguish the two.
What materials are used to repair a cracked fiberglass tank?
Repair materials include fiberglass mat and woven roving laminates with a resin system matched to the application:
- Polyester for general-duty service
- Vinylester for corrosive chemical service
- Epoxy for high-performance applications
Appropriate corrosion liner veils — C-glass, Nexus, Harlar, or synthetic — are selected based on the stored media.
Can I repair a fiberglass tank crack myself, or do I need a professional?
Very minor surface cracks on non-critical, general-purpose tanks can be patched with a commercial kit. Cracks on chemical-service, water-service, or industrial tanks require a qualified FRP technician using the correct resin system, with post-repair testing to validate the work.
How long does a fiberglass tank crack repair last?
A properly executed repair can last the remaining service life of the tank. Premature failures trace almost entirely to inadequate surface preparation, wrong resin selection, or skipped post-cure steps.
How often should fiberglass tanks be inspected for cracks?
At minimum, conduct annual visual inspections for most industrial tanks. Schedule professional non-destructive testing every 3–5 years, or more frequently for tanks in aggressive chemical service or those already showing signs of lining degradation.