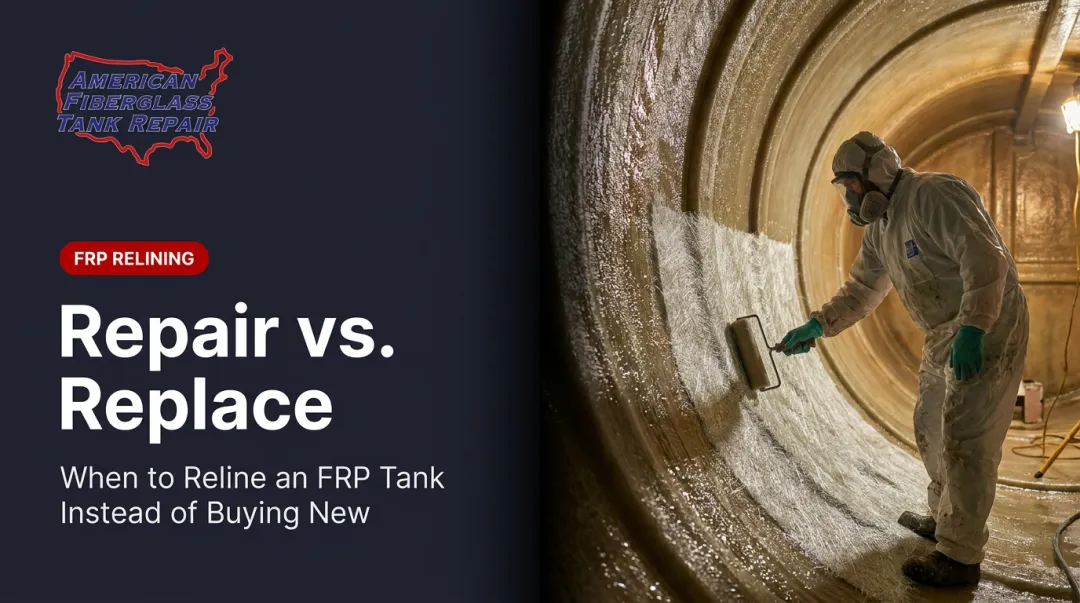
When that lining fails, facility managers face a decision with real consequences: repair surface damage, perform a full reline, or replace the tank entirely. Choose wrong and you're either spending capital you didn't need to, or putting a compromised vessel back into service.
This guide covers the most common FRP lining failure types, a clear step-by-step repair and relining process, how to match lining materials to your chemical service, and when professional intervention is the only responsible path forward.
Key Takeaways
- FRP lining failures follow predictable patterns (corrosion barrier breakdown, delamination, osmotic blistering, surface crazing), each requiring a different repair approach
- Repair addresses structural laminate damage; relining restores the corrosion barrier, and both are often performed together
- Work follows a fixed sequence: inspect, prep surfaces, repair structure, apply lining, cure, then test
- Resin selection (polyester, vinylester, or epoxy) must be matched to the specific chemical environment, not chosen by cost alone
- Widespread structural damage requires professional assessment before any repair work begins
What Is Fiberglass Tank Repair and Relining?
These two terms get used interchangeably, but they describe distinct processes.
Tank repair restores structural integrity to damaged laminate layers — addressing cracks, delamination, or wall thinning that compromises the vessel itself. Tank relining restores the internal corrosion barrier: the sacrificial inner layer that shields the structural laminate from whatever chemical the tank holds.
Most real-world projects require both. Structural repair corrects physical damage first; relining then re-establishes the chemical barrier for long-term service life.
That sequence makes full tank replacement unnecessary in most cases. Even when a tank has breached its corrosion barrier, the structural laminate typically remains intact — a sound substrate for a new lining. Relining restores years of service life at a fraction of new-tank capital cost, without the lead times of a replacement vessel order.
Common Problems With FRP Tank Linings
FRP lining failures tend to follow predictable patterns tied to chemical exposure, operational cycles, and maintenance history. Identifying the specific failure type is what drives the correct repair approach.
Corrosion Barrier Breakdown
The most common failure mode in aggressive chemical service.
Common signs include a dull, pitted, or chalky resin surface; early-stage blistering; slight color change; and chemical contamination of stored contents.
The root cause is usually prolonged exposure beyond the lining's rated chemical resistance, or a resin system never correctly matched to the stored fluid. Sodium hypochlorite is one of the most aggressive chemicals handled in FRP vessels — standard polyester resins have no business in that service.
AFTR's field inspections also frequently identify capillary migration of liquid product beneath the corrosion coat — a failure mode that develops before visible surface damage appears. Detecting it requires ultrasonic, laser, or high-intensity backlight testing, not a visual inspection alone.
Delamination
Signs of delamination include:
- Visible layer separation on the inner wall
- Hollow sound when tap-testing the surface
- Soft or spongy feel under hand pressure
Moisture ingress behind the lining is the most common cause. Inadequate surface preparation during original installation and mechanical impact can also trigger layer separation.
Osmotic Blistering
Signs of osmotic blistering include:
- Dome-shaped blisters on the inner lining surface, often containing fluid or gel
- Pitting craters where blisters have ruptured
Water or solvent permeates through micro-defects in the lining and builds pressure between the barrier and the structural laminate. Left unaddressed, the pressure eventually ruptures the surface.
Crazing and Surface Cracking
Signs include a fine network of surface cracks (crazing) or deeper cracks penetrating toward the structural laminate.
Thermal cycling and repetitive fill-and-empty stress are the most common causes. UV exposure on tanks without adequate exterior protection accelerates surface degradation as well.
The distinction between these two crack types determines the repair scope: crazing may only require relining, while through-cracks demand structural repair before any lining work begins.
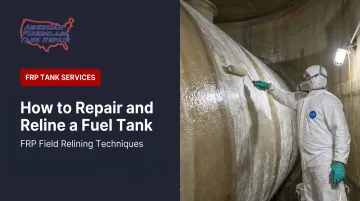
How to Repair and Reline a Fiberglass Tank (Step-by-Step)
Relining a tank over unresolved structural damage leads to premature failure — often within months. The sequence below is not optional; each step depends on the one before it.
Step 1: Inspect and Assess
Remove all stored contents, flush thoroughly with clean water, and allow the tank to fully aerate through open manways. Residual chemicals — chlorine, acids, sodium hypochlorite — will degrade lining materials and create confined-space hazards for entry personnel.
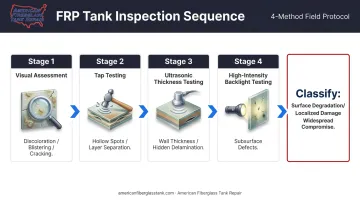
Conduct a thorough internal inspection:
- Visual assessment for discoloration, blistering, cracking, and delamination
- Tap-testing for hollow spots indicating layer separation
- Ultrasonic thickness testing to measure remaining wall thickness and identify hidden delamination
- High-intensity backlight testing to detect subsurface lining defects not visible to the eye
Document everything. Map damage locations, measure blister and crack dimensions, and classify findings as surface lining degradation, localized structural damage, or widespread structural compromise. This classification determines whether repair, relining, or replacement is the right call.
AFTR's inspections follow Fiberglass Tank & Pipe Institute (FTPI) protocols, with FTPI-certified inspectors compiling findings into condition reports that specify exactly which repairs are needed before any lining work begins.
Step 2: Prepare the Surface
Surface preparation is the single most critical factor in lining adhesion and long-term performance. No amount of high-quality resin or laminate compensates for poor prep.
- Grind down all damaged areas to remove degraded lining, expose the full depth of cracks, and create a clean mechanical bond surface
- Abrasive blast or mechanically sand the entire interior surface to the required profile
- Remove all contamination, oils, and loose material — the surface must be completely dry and free of solvent residue before any repair or lining material is applied
Step 3: Perform Structural Repairs (If Required)
Don't proceed to lining until all structural issues are resolved.
- Delamination: Inject compatible resin into the void, or grind out the affected area and rebuild with fiberglass mat and resin — never apply lining over active delamination
- Cracks: Grind to a V-groove profile to ensure full resin penetration, then rebuild using fiberglass laminate layers matched to the original construction (chopped strand mat, woven roving, or veil layers as appropriate)
- Osmotic blisters: Cut out and remove all blister material, then let the substrate dry fully. Moisture trapped beneath a repair is one of the most reliable predictors of early failure
Step 4: Apply the New Lining
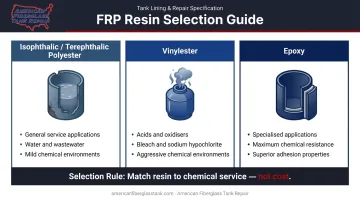
Resin selection is driven by chemical compatibility, not cost. The wrong resin in an aggressive service environment will fail regardless of application quality.
| Resin Type | Typical Service |
|---|---|
| Isophthalic/terephthalic polyester | General service, water, mild chemicals |
| Vinylester | Aggressive chemical environments: acids, bleach, sodium hypochlorite |
| Epoxy | Specialized applications requiring maximum chemical resistance and adhesion |
For sodium hypochlorite service specifically, research from Diamond Fiberglass and Ashland identifies brominated epoxy vinyl ester resin with a BPO/DMA/TBPB cure system as the best-tested option — and explicitly warns that cobalt-based conventional cure systems can promote resin attack in bleach service.
Lining application sequence:
- Apply a resin-rich inner surface veil layer for maximum chemical resistance
- Build thickness with chopped strand mat layers, thoroughly wetted out and rolled to eliminate air pockets
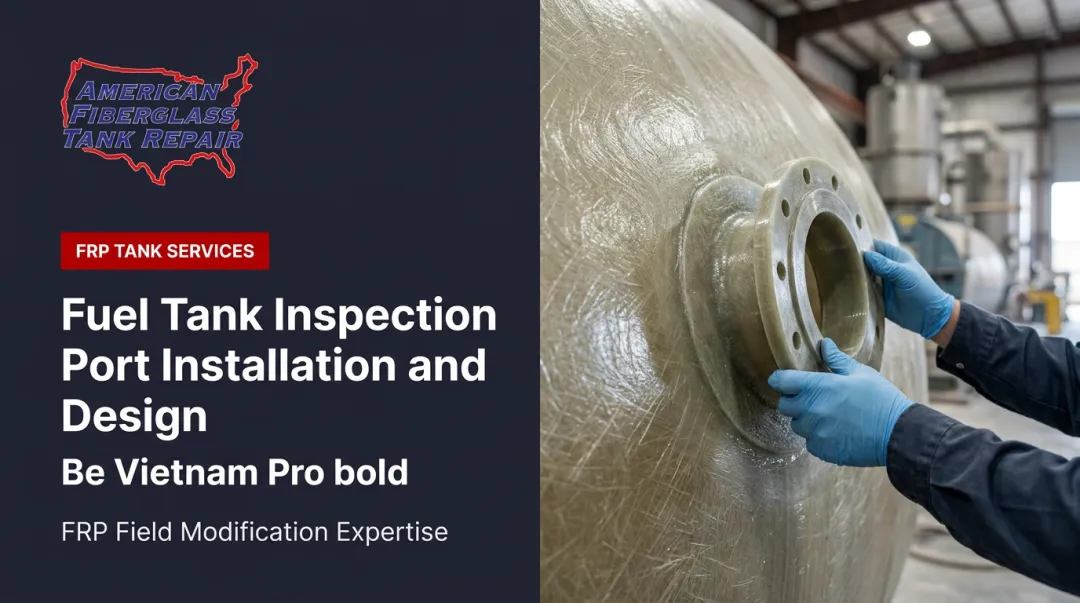
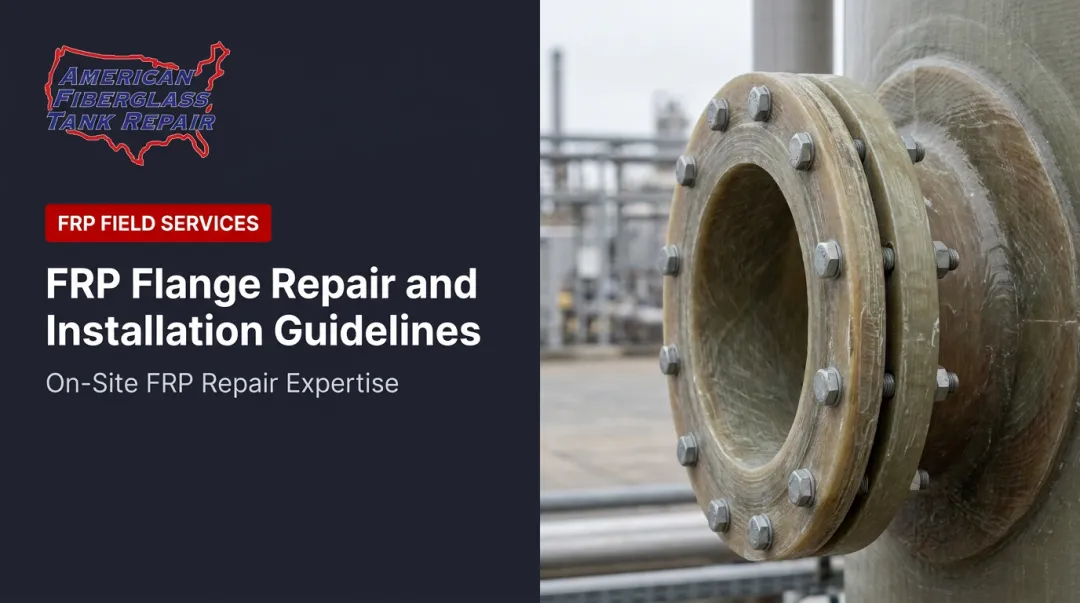
- Detail nozzles, flanges, and corners with additional laminate reinforcement — these are the most common adhesion failure sites
Matching resin and laminate to the specific chemical service and operating temperature is where most generic repair attempts fall short. AFTR works with custom-blended versions of all three resin types and over 45 laminate options — including carbon, Nexus, and Harlar veils — selected for the actual service conditions of each tank.
Step 5: Cure and Quality Testing
Allow full cure per the resin manufacturer's specifications. Temperature, humidity, and cure time all affect final hardness and chemical resistance — returning a tank to service before full cure is a common cause of early lining failure.
Post-cure quality testing checklist:
- Holiday (spark) testing to detect pinholes and discontinuities in the lining
- Ultrasonic or high-intensity backlight testing to verify lining thickness and adhesion
- Visual inspection for dry spots, trapped air, or surface defects
- Barcol hardness testing to confirm adequate cure
Document all results before sign-off.
When to Repair/Reline vs. Replace Your FRP Tank
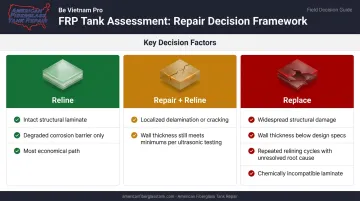
The repair-versus-replace decision comes down to three factors: structural condition, chemical service history, and true cost of ownership. Visible lining condition alone doesn't tell the full story.
Reline when: Lining has degraded but the structural laminate is intact. This is the most common scenario. The corrosion barrier needs restoration, but the vessel itself still has service life — relining is the more economical choice.
Repair then reline when: Localized delamination or cracking exists alongside lining failure, but remaining wall thickness meets structural minimums confirmed by ultrasonic testing. Address the structural repair first, then proceed with relining.
Consider replacement when:
- Structural damage spans a large percentage of the tank wall area
- Ultrasonic measurements show wall thickness no longer meets design specifications
- Multiple relining cycles have progressively weakened the structural laminate with no identified root cause correction
- The tank's structural laminate (not just the lining) is chemically incompatible with a new, more aggressive stored fluid
One important note: there are no universal public wall-thickness condemnation thresholds for in-service FRP tanks. ASME RTP-1, ASTM D4097, and ASTM D3299 cover design and fabrication requirements, but in-service condemnation criteria require professional engineering assessment against the original design specifications for that specific vessel.
Per FT&V RP 2007-1, inspection outcomes can lead to no action, further investigation, repair, operational changes, or replacement — that determination belongs with a qualified inspector, not a cost estimate.
Common Mistakes to Avoid
Lining over unresolved structural damage will cause premature failure. Active delamination or moisture-saturated laminate must be addressed through ultrasonic testing and structural repair before any relining begins.
Choosing resin by cost rather than chemical compatibility is one of the most common — and costly — errors. A polyester lining in sodium hypochlorite or strong acid service will fail far sooner than a correctly specified vinylester or epoxy system. The difference in resin cost is minor compared to a premature reline or a containment failure.
Skipping post-application quality testing leaves failures hidden. Holiday testing, thickness verification, and adhesion checks are not optional — undetected pinholes or thin spots become leak paths under operating pressure and thermal cycling.
Skipping recurring inspections allows lining degradation to reach the structural laminate undetected. FT&V RP 2007-1 sets the following minimum intervals:
- Annual: Preventive maintenance inspections for all FRP tanks
- Every 5 years: Trained external inspections for hazardous-substance service
- Every 10 years: Trained external inspections for other service (tanks over 10,000 gallons)
- Every 3–5 years: Internal inspections for aggressive chemical service — sodium hypochlorite, hydrochloric acid, ferric chloride
Catching lining degradation before it reaches the structural laminate is always cheaper than addressing it after.
Frequently Asked Questions
What is tank relining?
Tank relining restores the internal corrosion barrier of a storage vessel by applying new lining materials to the interior surface. It protects the structural wall from the stored chemical or liquid — performed when the original lining has degraded past the point of effective protection.
How much does a tank liner cost?
Cost varies significantly based on tank size, lining material (polyester vs. vinylester vs. epoxy), the extent of required structural repair, and site access conditions. A professional assessment is required for an accurate quote. No meaningful cost-per-gallon benchmarks apply consistently across different tank sizes and chemical services.
How long does a tank liner last?
Lifespan depends on resin selection, chemical aggressiveness, operating temperature, and installation quality. Peer-reviewed research estimates FRP tank life in hydrochloric acid storage at 15–20 years, and one documented case study recorded a 50% sodium hydroxide FRP tank operating maintenance-free for 25 years. Regular inspection is the key variable — catching degradation early extends usable life significantly.
Can a fiberglass tank be repaired instead of relined?
Repair addresses structural damage to the laminate layers; relining restores the corrosion barrier. They are separate processes often performed together. Repair alone may be sufficient if structural damage is localized and the existing lining is still providing adequate chemical protection.
How do I know if my FRP tank needs repair, relining, or replacement?
That determination requires a proper internal inspection: visual assessment, tap-testing, and ultrasonic thickness measurement. Outcomes generally follow this pattern:
- Surface lining degradation → relining
- Localized structural damage → repair plus relining
- Widespread structural failure → replacement
How long does the repair and relining process take?
Timelines depend on tank size, damage extent, and resin cure requirements. A straightforward reline on a mid-size tank typically takes several days; complex structural repairs followed by full relining can extend one to two weeks. Tanks must not return to service before full cure is confirmed. Returning a tank to service prematurely is one of the most common causes of early lining failure.